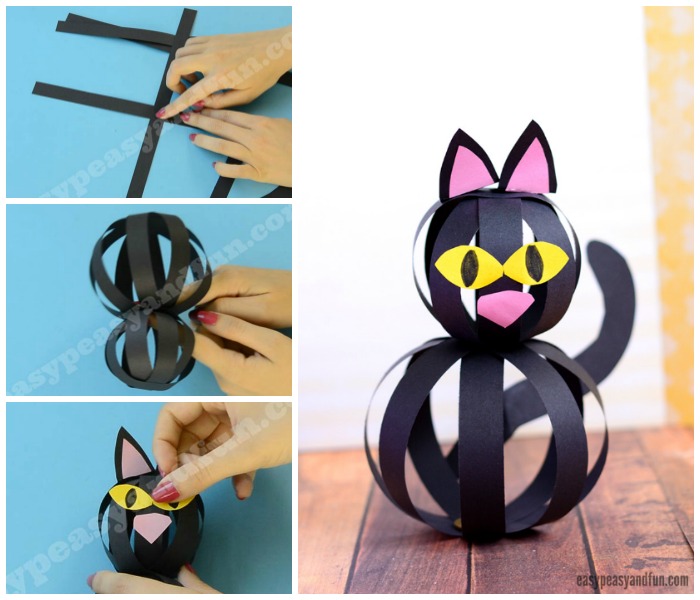
What you need:
- black paper (regular print paper or construction paper)
- scissors or paper trimmer (we suggest a trimmer)
- a little bit of yellow paper
- a little bit of pink paper
- glue
Other color combinations are welcome too.
Watch The Video Tutorial
Or Follow these Step by Step Instructions
We are working with 2 letter sized (A4) sheets of paper.
You will need to cut 4 short strips and 4 longer strips of paper (the strips are about an finger wide, younger kids will make wider, older kids can make thinner and even use more strips).
For the long strips we made them by cutting the letter/A4 sized paper across it’s length.
Shorter ones we did by cutting the letter/A4 sized paper across it’s width.
 Align the short strips and the long strips (separately). Gently bend in half to mark the middle of the strips (you can also do one by one).
 Start with one length. Glue the two strips one on top of the other (crossing in the middle – at the fold where you bent them).
Loop and glue all the strips, a paper ball will form.
Repeat with the other ball.
Let the glue dry before you continue.
You will have to hold them together for a while to allow the glue some time to set.
Decorate!
Cut two triangle shapes for the ears. You can decorate them with pink paper.
You can also add whiskers.
If you want your Cat Craft with Paper Strips to stand on it’s own, also cut a round base and glue it on the bottom of the large paper ball (alternatively you can also glue a coin inside).


